Update: Free trials of Midjourney have been temporarily suspended!
Midjourney’s CEO and founder, David Holz, announced on 3/28 that the company would be suspending its free trial service. This move led some to speculate that it was due to concerns about the proliferation of fake news.
However, in a recent response to inquiries from the media, Holz explained that the suspension was not related to fake photos, as generating real images requires the use of the V5 version, which is a paid service. He further explained that the suspension of the free trial was due to a large number of users creating multiple accounts solely for the purpose of accessing the service for free, and then abandoning the accounts once they had finished using it. Holz specifically mentioned a tutorial video from China as a suspected source of the traffic that overwhelmed the servers.
“We tried new security measures to address this abuse, but they proved ineffective, so we had no choice but to suspend the free service again,” he said. Holz did not provide a timeline for when the service would be reinstated.
Let us cherish and reminisce about it~~
Midjourney is a very useful AI image generation software. Unfortunately, after using 25 images, you must subscribe to the paid service to continue generating images. However, there is a method that has been discovered to bypass this restriction. Let’s take a look together.
1.Normal Midjourney account
First, you need to have a Midjourney account that is tied to an email address. Then, log in to Midjourney’s Discord account: https://discord.gg/midjourney (this is important!)
2.Create a server
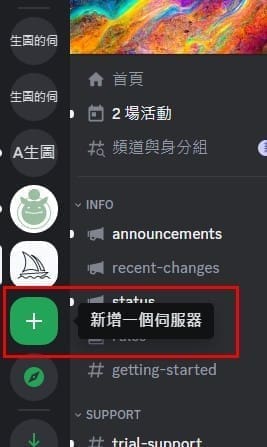
After entering Discord, you can see a + symbol on the left-hand side. This is where you can add a new server.
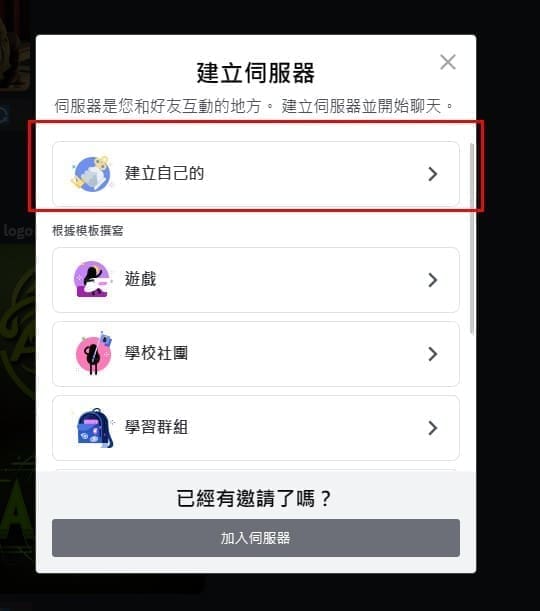
After clicking the + symbol, a window for creating a server will appear. Click on “Create Your Own” to proceed.
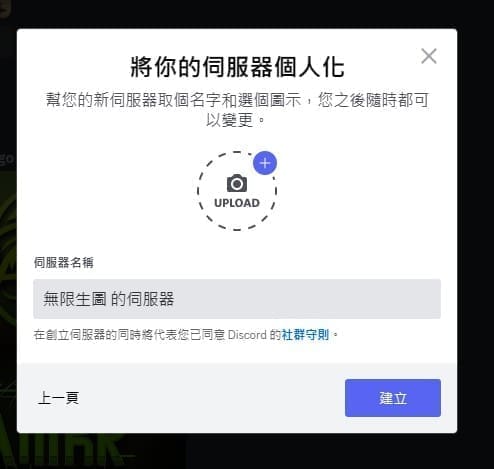
Next, a personalized interface for the server will appear. Enter the name you want for your server in the server name field, and then click on “Create.”
Now, your server has been created.
3.Invite Midjourney Bot to the server
After creating the server, we can invite the Midjourney Bot to it. This is necessary because we will be generating images within this server. Please note that only the creator of the server has the authority to invite the Midjourney Bot.
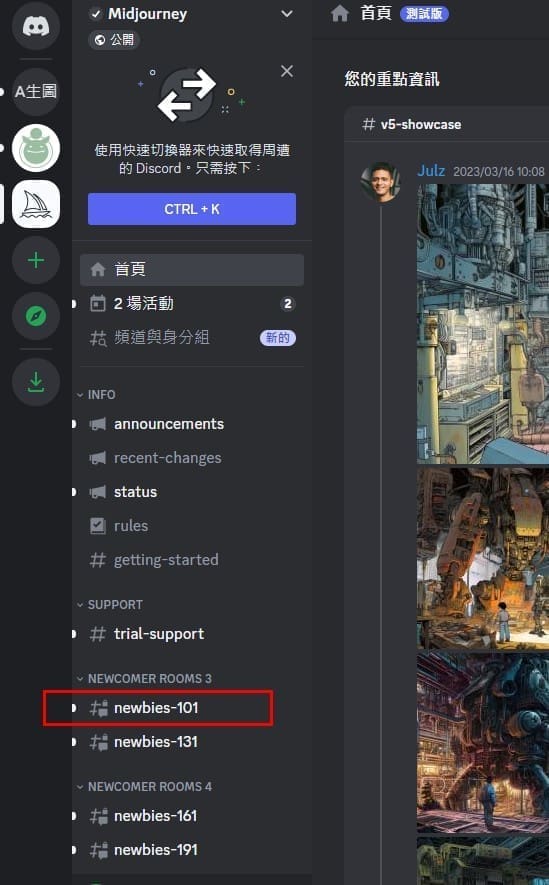
First, we need to enter the “newbies” area, where we can find the Midjourney Bot. I have chosen “newbies-101,” so click on it to enter.
Next, we will move our attention to the upper right corner, where there is an icon of people, indicating the member list.
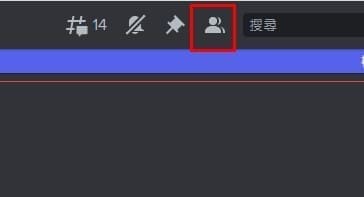
After clicking on it, all the members in the group will be displayed on the right-hand side. At this point, we just need to find the Midjourney bot,
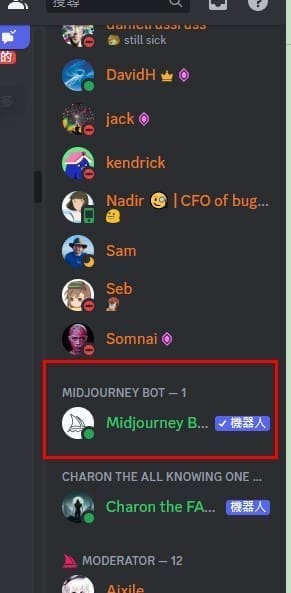
click on it, and its information will be displayed, but it’s not important. We just need to click on “Add to Server.”
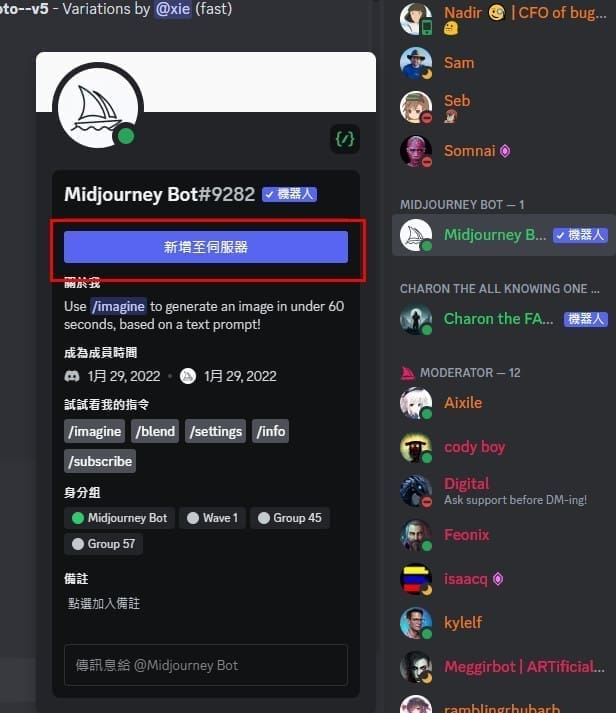
After clicking, we need to choose the server that we just created. In my case, I chose the server for Infinite Life. Once we have made the selection, we can click “Continue.”
Once again, it is important to note that you must be the creator of the server to have the authority to invite the Midjourney bot.

Next, an authorization information page will appear, where everything is pre-selected by default, so we don’t need to make any changes. Just click on “Authorize.”
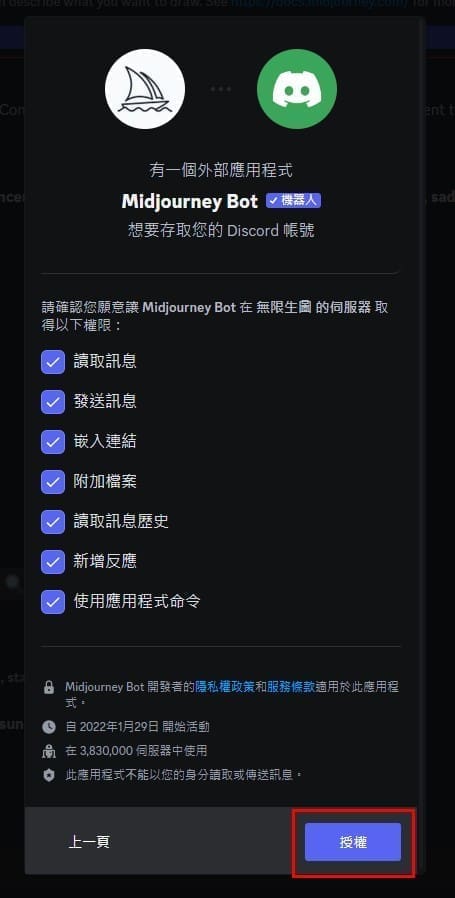
When we see the checkmark indicating that authorization has been granted, it means that we have completed the process!
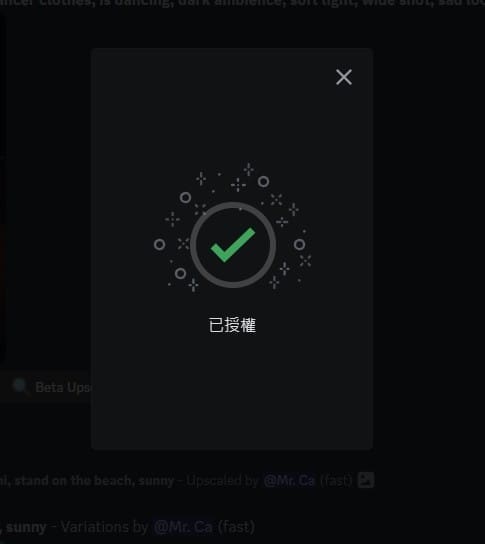
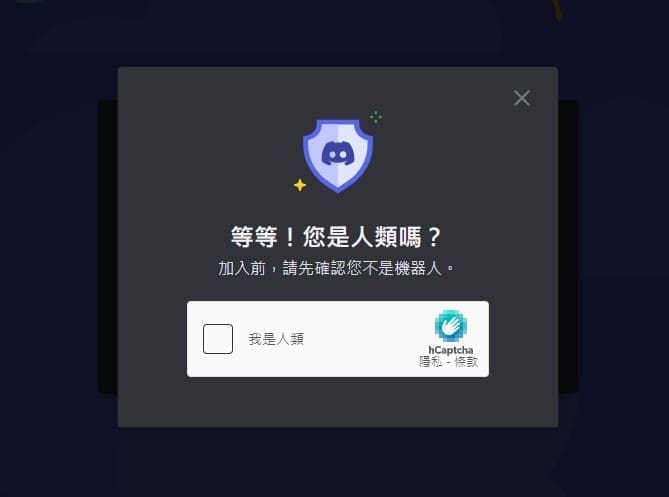
During the process, you may be asked repeatedly to confirm that you are human. Remember to check the box and complete the small test.
4.Generate server link
After inviting the bot, we have completed half of the work! Next, we need to generate an invitation link within the server that we just created. To do this, click on the server’s avatar, and then click on the icon to create an invitation link. We click on the person icon with a plus sign on its head.

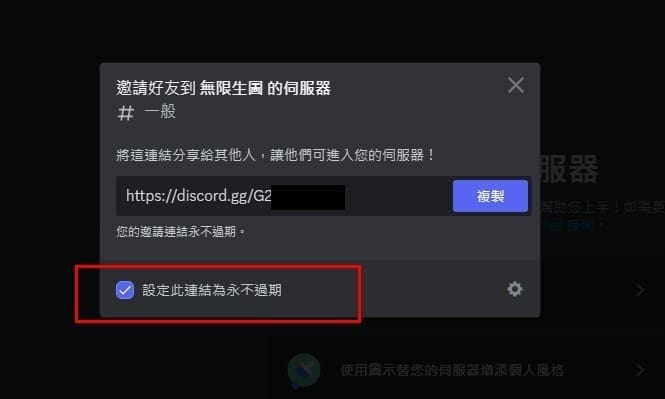
After clicking, a link will appear. It is important to note that we need to check the “Never expire” option for this link because we will use this link to enter the server and generate the image later on. Once we have checked the option, we can copy the link.
5.Open incognito window
Remember to open an incognito window for this step! If you have installed the desktop version of Discord, be sure to remove it first because all the operations will be processed in the incognito window. If you use Chrome, click on the three dots in the upper right corner and select “New Incognito Window.”
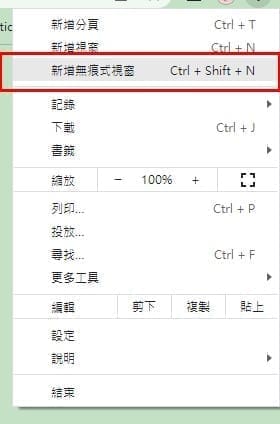
If you use Edge, do the same, and select “New InPrivate window.”
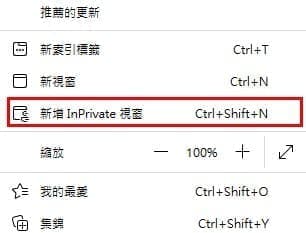
6.Create an account for Infinite Life Graphs.
After accessing the server through the provided link, a Discord invitation window will appear. Click on “Accept Invitation” to proceed.
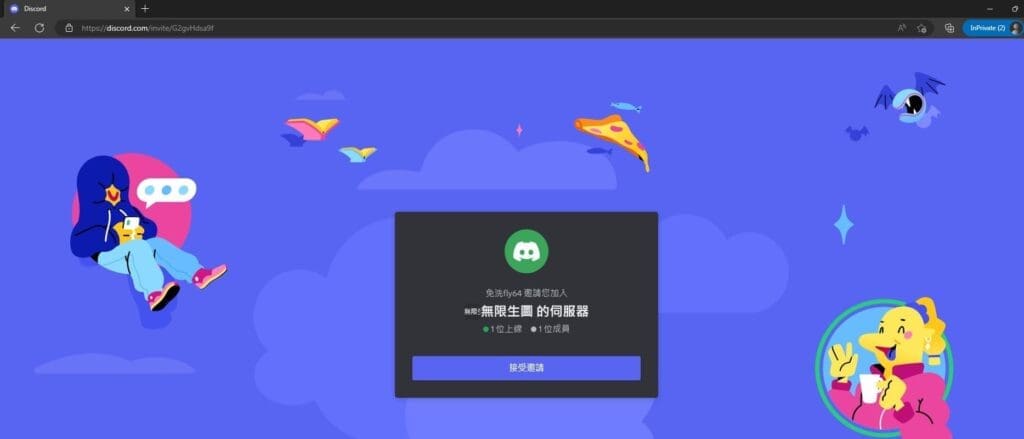
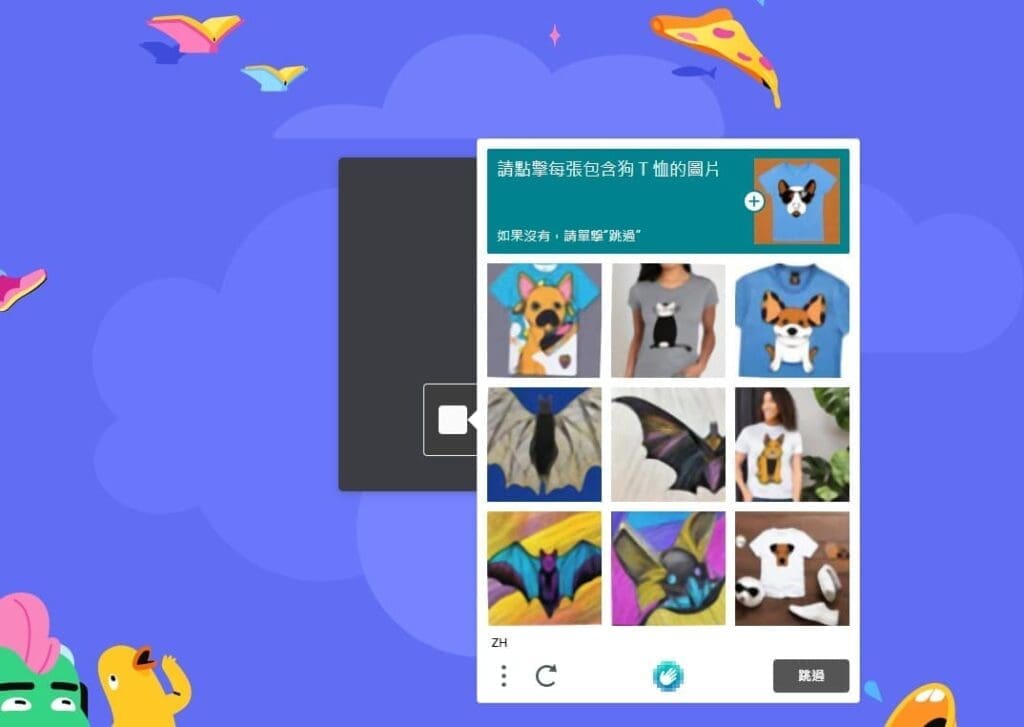
At this point, you will be asked to complete a verification test to confirm that you are a human.
Although it may seem amusing for a computer to question whether or not you are human, the reality is that hackers are becoming increasingly proficient at using programs to generate unlimited accounts, which places a significant burden on the service and can cause crashes. This type of behavior is what is referred to as a “hacker attack.”
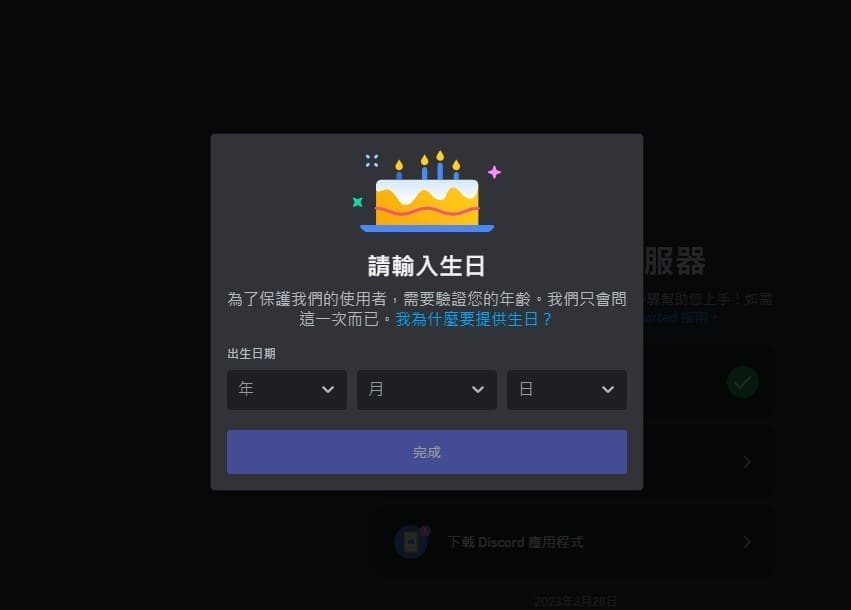
After completing the verification process, a window will appear asking you to enter your birthdate. Simply enter your own birthdate here, but if you are under 18, it is best to enter an age above 18 to avoid potential problems.
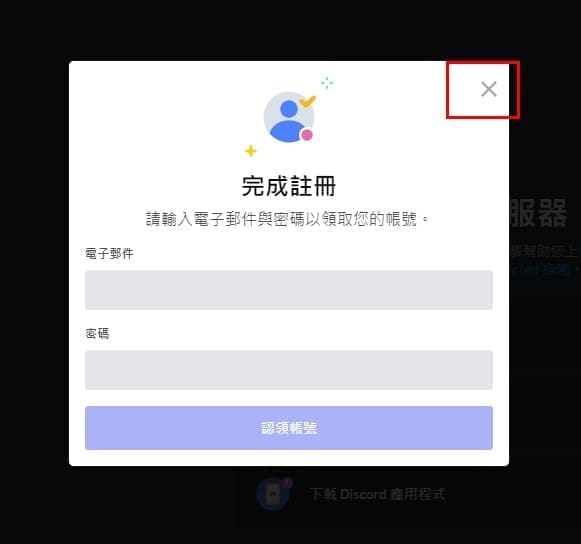
After entering your birthdate, you will be prompted to register. Simply click on the “Close” button and don’t worry about it.
7.Done!
Now, you can generate images confidently in this server without having to worry about the 25-image limit!
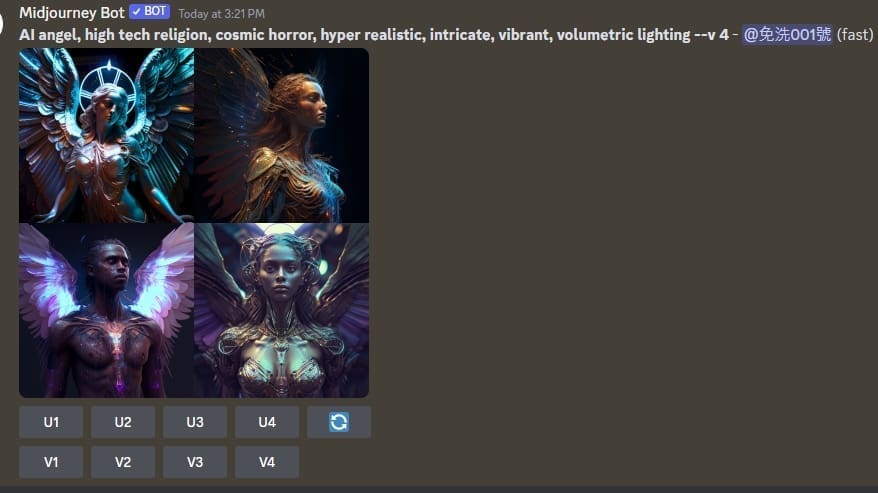
If a message pops up asking you to claim your account, you can ignore it and continue using the service.

Troubleshooting:
What if I accidentally close the window?
As long as the link is still available, it is not a problem. Simply reload the page and log in to your account. If the account is no longer available, go back to step 6 and create a new account.
What if I forget the link?
Go back to step 1 and log in to your original account. You will see the server on the left-hand side. Then, proceed to step 4. Since we have selected the option to create a permanent link, you do not need to generate a new link. Simply copy the link and follow the steps to generate unlimited images.
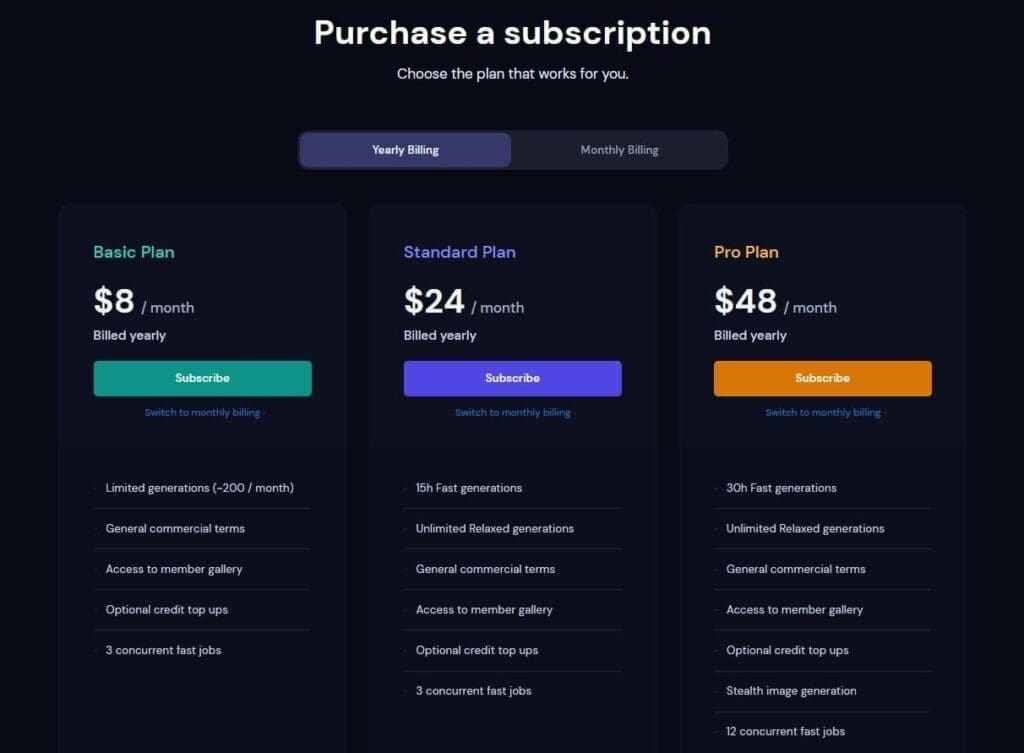
Midjourney AI Subscription Plan
Using the normal method, users can pay to subscribe. After using up the 25 images, they can go to their account and access the detailed subscription information.
There are three monthly subscription plans available, with faster image generation and the ability to generate and download the same image infinitely with the standard or higher plan. Additionally, users can handle three or more life chart tasks at the same time, greatly speeding up the process.
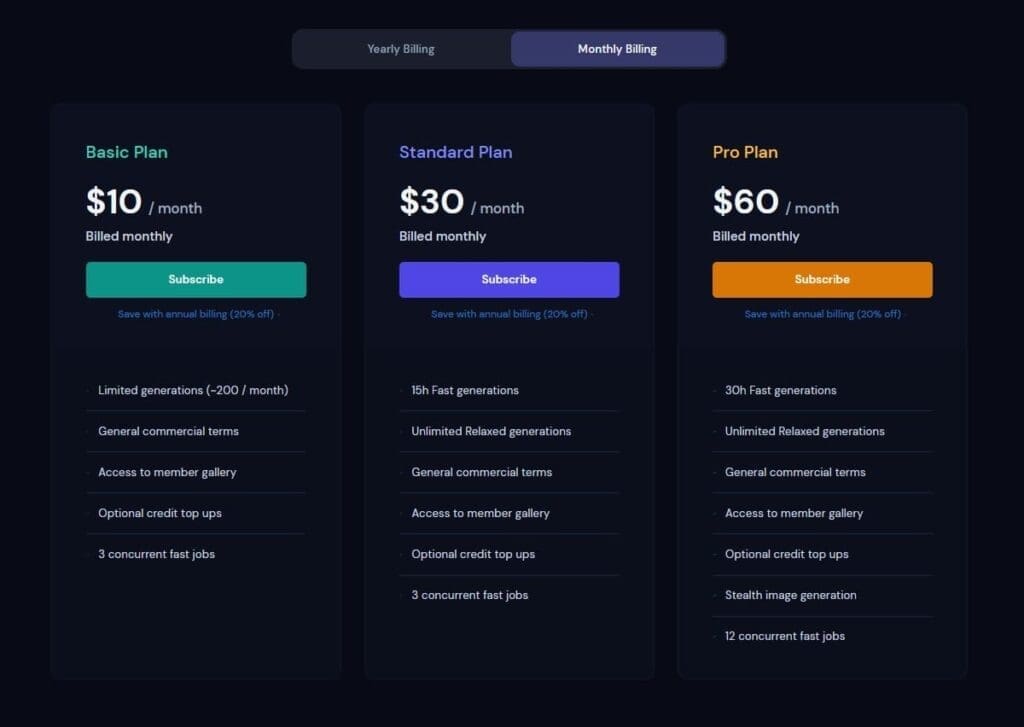

If you really like the service and plan on using it for a while, it is recommended to subscribe to the yearly plan for an 20% discount!



Comments are closed